BDK Setup and Development Guide
Learn how to set up, develop, and run your Book locally with the BDK.
Prerequisites
Ensure the following prerequisites are met and dependencies are installed before proceeding:
2. Docker
3. Cookiecutter
4. Poetry
5. pyenv (recommended)
Used to manage Python versions and project dependencies with the pyenv-virtualenv plugin.
- Follow the installation steps for pyenv.
- Follow the installation steps for pyenv-virtualenv.
6. Python 3.11+
To install with pyenv:
pyenv install 3.11Setting Up Your Project
Set up your project using the BDK Template, a tool designed to simplify the creation of Books.
1. Clone and Initialize
Clone the BDK Template from GitHub and initialize your project with Cookiecutter:
cookiecutter git+ssh://[email protected]/kognitos/bdk-template.gitEnter the following project details or press Enter to keep the defaults:
| Configuration | Description | Default |
|---|---|---|
| Project Name | The name of your project. | Sample Book |
| Project Slug | A URL-friendly version of the project name. If not provided, this will be derived from the project name. | sample_book |
| Project Description | A short description of the project. | A short description of the project. |
| Author Name | You or your organization's name. | Kognitos |
| Initial Version | Initial project version. | 0.1.0 |
2. Enter Project Directory
Navigate into the new project directory:
cd sample_bookReplace
sample_bookwith your own Project Slug from the previous step.
3. Create a Virtual Environment (recommended)
We recommend creating a virtual environment to isolate and manage your project dependencies. Ensure that prerequisites #5-6 are completed before proceeding.
1. Configure Poetry to create the virtual environment inside the project’s root directory:
poetry config virtualenvs.in-project true2. Create a virtual environment:
poetry env use 3.11Setting Local Python Version
If you encounter this error:
pyenv: python3.11: command not found

The python3.11' command exists in these Python versions:
  3.11.11
Run the following command to set the Python version locally for the current directory:
pyenv local 3.11
macOS/Linux:
source $(poetry env info --path)/bin/activateWindows (PowerShell):
{path_to_venv}\Scripts\activate.ps1Note: To later exit the virtual environment later, run
deactivate.
4. Install dependencies
poetry installProject Structure
The project is organized with the following structure:
📂 sample_book
├── 📁 src
│   └── 📁 sample_book
│       ├── 📃 __init__.py
│       ├── 📃 __version__.py
│       └── 📃 book.py
│       └── 📁 data
│           └── 🖼️ icon.svg
├── 📁 tests
│   └── 📃 test_book.py
├── 📃 Dockerfile
├── 📃 pyproject.toml
├── 📃 poetry_script.py
├── 📃 poetry.lock
├── 📃 README.md
└── 📃 USAGE.md
Root Directory
The project root directory is named using the Project Slug (default: sample_book).
Source Code Directory
📃 book.py: Contains the core class where your Book is defined and implemented.📁 data: Holds images like🖼️ icon.svg, the default SVG used as a Book's icon.
Test Directory
📃 test_book.py: Contains unit tests to validate the Book's functionality.
Configuration and Dependency Files
📃 Dockerfile: Builds the Docker image.📃 pyproject.toml: Manages dependencies and settings.📃 poetry_script.py: Custom automation script.📃 poetry.lock: Locks dependency versions.
Documentation
📃 README.md: Project overview documentation, including setup and usage instructions.📃 USAGE.md: Reference documentation for your Book. This file is not included by default. For details on how to generate it, see Generating Documentation.
Implementation
Implement your Book in book.py. This class is auto-generated by the BDK Template and serves as the starting point for your Book’s implementation. Use decorators to configure settings, define procedures, and establish API connections. Refer to the BDK API Reference for details.
@book(icon="data/icon.svg")
class SampleBook:
	# Your Book implementation goes here
Development Commands
This section outlines essential commands for Book development and testing.
Formatting
Code formatting automatically adjusts your code's structure, ensuring adherence to coding standards, readability, and maintainability. To apply the formatting, run:
poetry run formatLinting
Pylint is used as the source linter for BDK projects. The linter analyzes and enforce coding standards, checks for errors in Python code, and improves code quality. To run the linter:
poetry run lintGenerating Documentation
This command will generate a comprehensive USAGE.md file by extracting and formatting the docstrings from your code. To generate the documentation, run:
poetry run docTesting
Pytest is used for testing and validating your Book. To run the test suite, run the following command:
poetry run testsPackaging with Docker
Build a Docker image to package your Book:
docker build -t <project_slug>:<version> .Architecture Compatibility
This image pulls the BDK Runtime base image from Docker Hub, which is currently available only for the linux/amd64 architecture. If you're using a machine with a different architecture, you can use the
--platformflag to emulate linux/amd64 when building the image:docker build --platform linux/amd64 -t <project_slug>:<version> .
Running Your Book Locally
To test your Book in Kognitos before deployment, you can run your Docker image locally with ngrok. Ngrok is a tool that creates a secure tunnel to your local machine and provides a public URL to make your local Docker image accessible from the platform.
To run your Book locally, it must first be packaged as a Docker image.
1. Install ngrok
- Follow the installation steps for ngrok based on your system.
- You will need to sign up for a free account.
2. Obtain your ngrok authtoken
- Navigate to Your Authtoken in the ngrok portal and copy your token.
3. Add your authtoken
ngrok config add-authtoken <token>4. Run your Docker image in ngrok mode
Make sure to replace auth_token, project_slug, and version with your own values:
docker run -e BDK_SERVER_MODE=ngrok -e NGROK_AUTHTOKEN=<auth_token> <project_slug>:<version>5. Copy the URL
In the logs, you'll see the ngrok address in the following format. Copy the URL:
listening on https://<SOME_UUID>.ngrok-free.app6. Add the URL to your automation
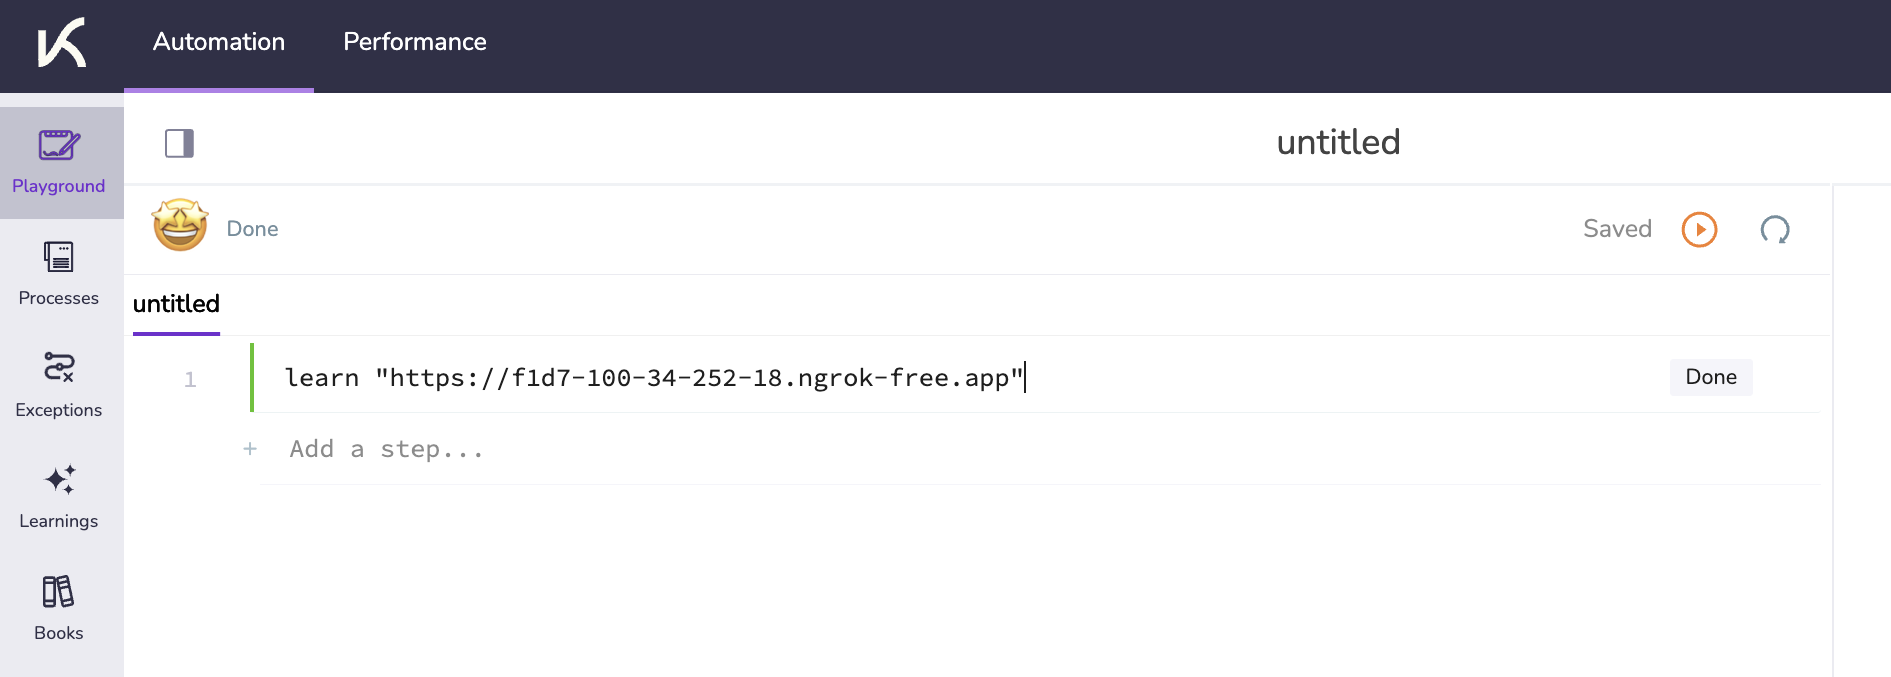
Copy the URL and paste it into your Kognitos Playground using this syntax:
learn "https://f1d7-100-34-252-18.ngrok-free.app"
After completing these steps, you can interact with your Book directly in the Playground.
Updated about 12 hours ago
