> For the complete documentation index, see [llms.txt](https://docs.kognitos.com/llms.txt). Markdown versions of documentation pages are available by appending `.md` to page URLs; this page is available as [Markdown](https://docs.kognitos.com/guides/administration/user-options/remote-connections.md).
# Remote Connections
Connect Kognitos to on-premises and private network services through a secure IPsec VPN tunnel.
## Overview
Remote connections let Kognitos reach applications hosted on your private network. They work by establishing an IPsec VPN tunnel between Kognitos and your network gateway, so your automations can securely interact with systems that are not publicly accessible.
Once a remote connection is configured, you can associate any integration with it. For example, you could route an [HTTP](/guides/platform/integrations/http.md), [Postgres](/guides/platform/integrations/postgres.md), [MSSQL](/guides/platform/integrations/mssql.md), or [SAP](/guides/platform/integrations/sap.md) connection through the tunnel to reach an internal instance behind your firewall.
## Creating a Remote Connection
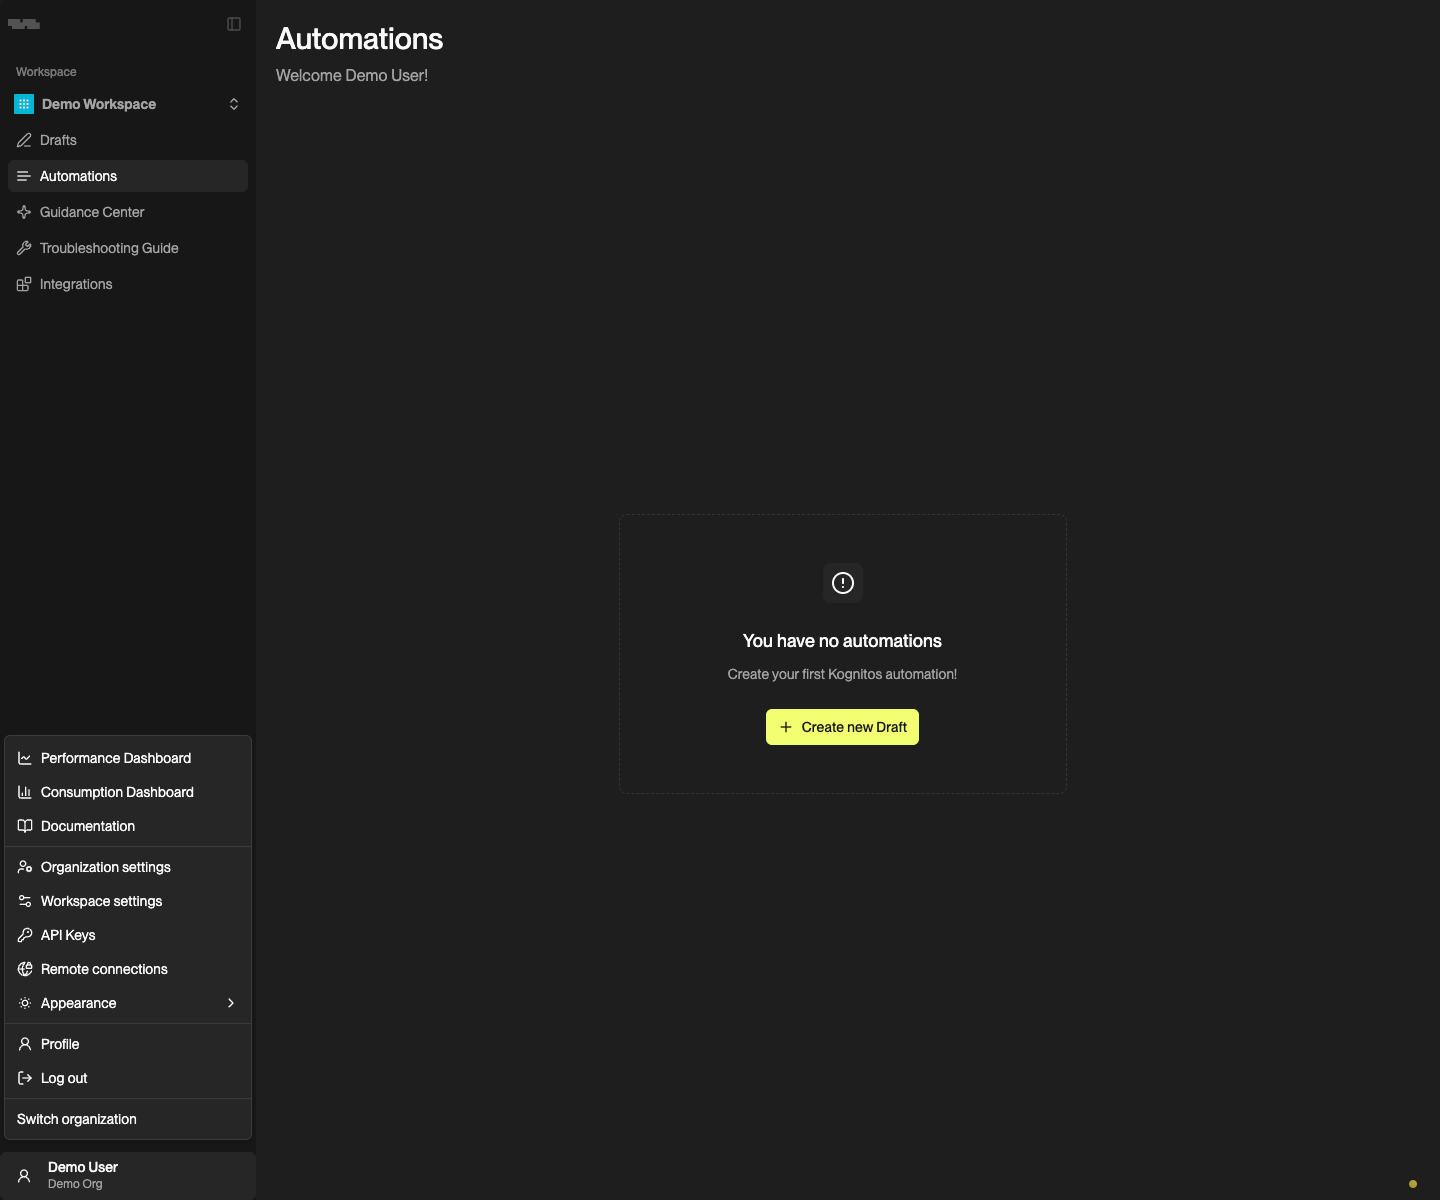
To create a new remote connection, click your name or profile avatar in the bottom-left corner to open the user menu, then select **Remote connections**.
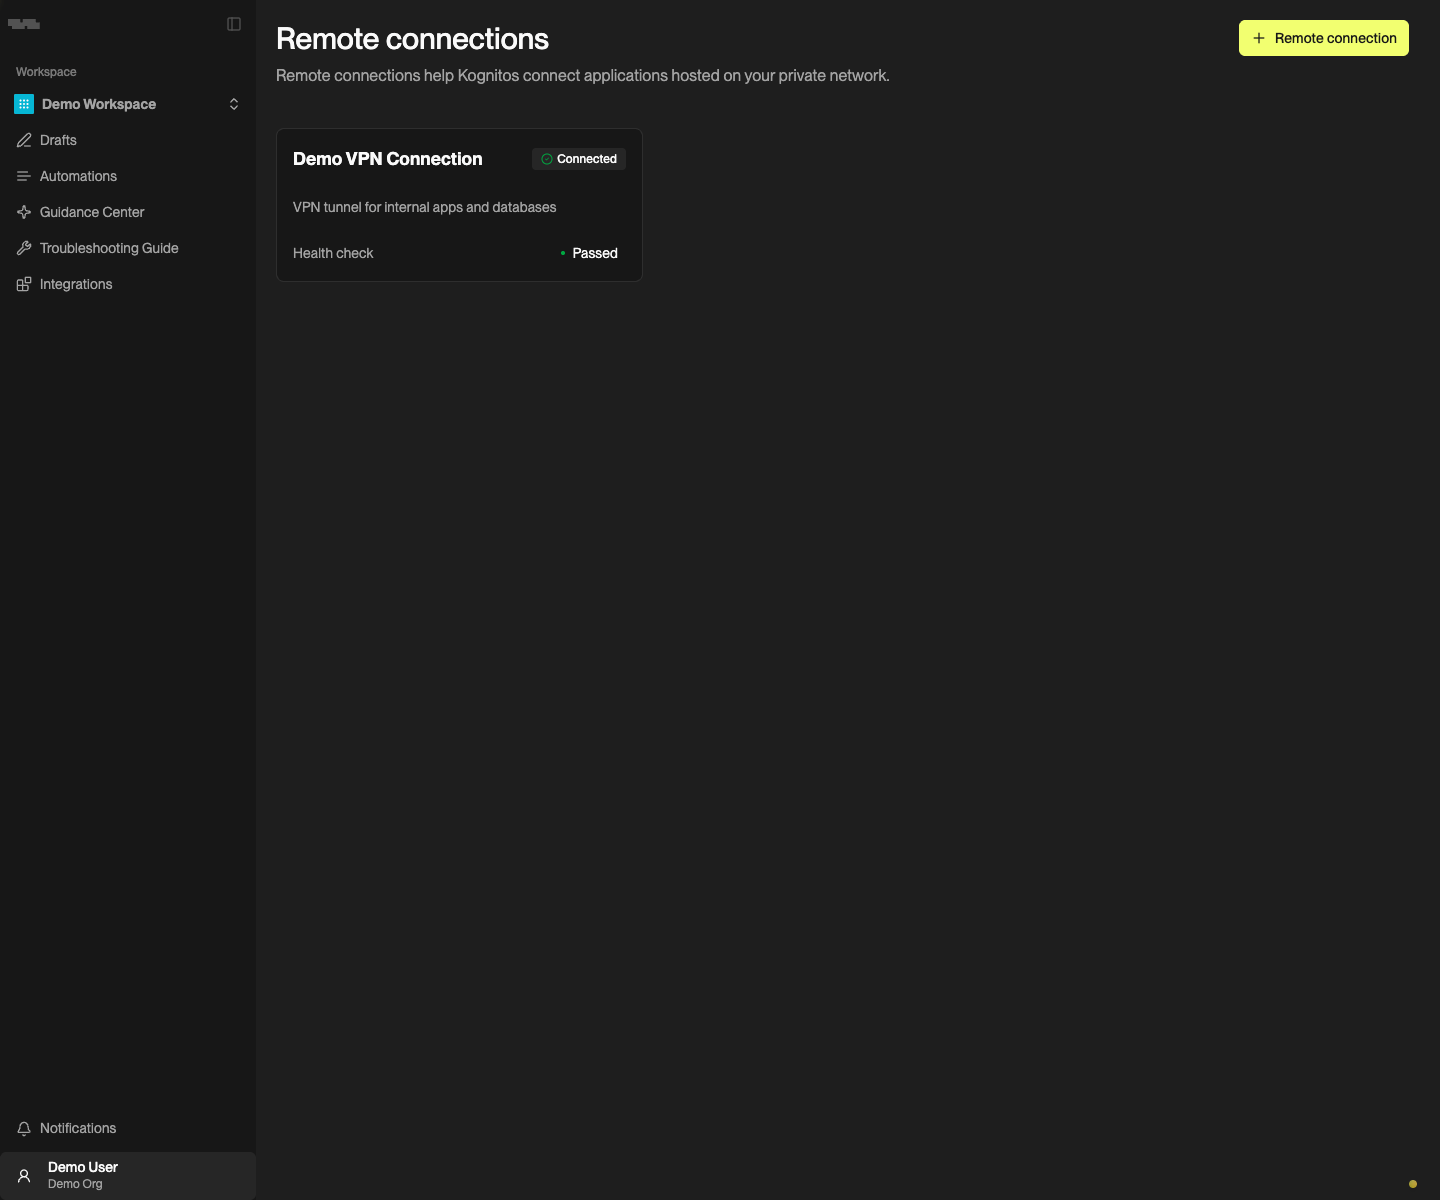
On the Remote Connections page, click **Remote connection** to open the creation form.
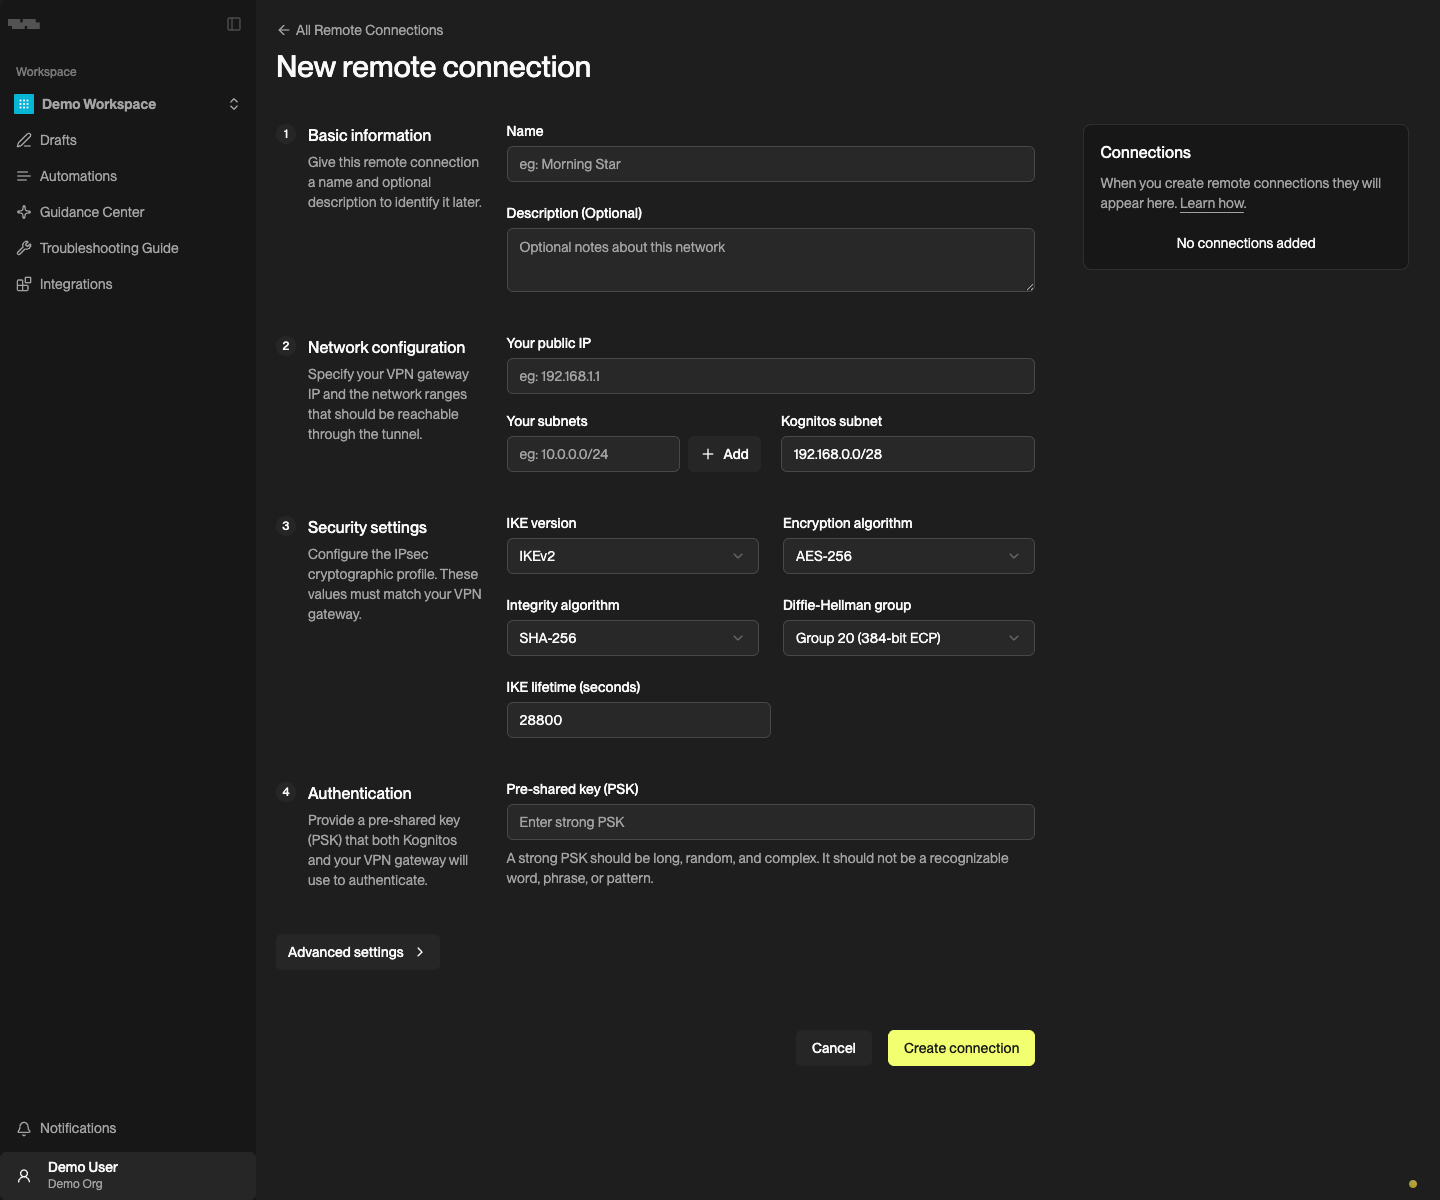
The form has four main sections, plus optional advanced settings:
### 1. Basic Information
| Field | Required | Description |
| -------------------------- | -------- | -------------------------------------------------------------------------------------- |
| **Name** | Yes | A descriptive name for this remote connection, such as `Demo VPN Connection` |
| **Description (Optional)** | No | Optional notes about the network, such as `VPN tunnel for internal apps and databases` |
### 2. Network Configuration
{% hint style="info" %}
This section shows the Kognitos public IP address for your environment. Copy it and allowlist it on your VPN gateway or firewall so Kognitos can establish the tunnel.
{% endhint %}
| Field | Required | Description |
| ------------------- | -------- | ------------------------------------------------------------------------------------------------------------------------------------------------------------------------------------------------------------------ |
| **Your public IP** | Yes | The public IP address of your VPN endpoint |
| **Your subnets** | Yes | The network ranges on your side that should be reachable through the tunnel (for example, `10.0.0.0/24`). Click Add to add multiple subnets. |
| **Kognitos subnet** | Yes | The IP range that Kognitos will use as the source for traffic through the tunnel. Your VPN device should allow this range as the remote or peer subnet. Use `192.168.0.0/28` unless it overlaps with your network. |
### 3. Security Settings
These settings define the cryptographic profile for both Phase 1 (IKE) and Phase 2 (ESP) of the IPsec tunnel. Kognitos applies the same algorithms to both phases, so you do not need to configure Phase 2 separately on your VPN device; use the same values for both.
| Field | Required | Description |
| -------------------------- | -------- | ------------------------------------------------------------------------------------------------------------------------------------ |
| **IKE version** | Yes | The IKE protocol version for key exchange. IKEv2 is recommended for most deployments; use IKEv1 only if required by your VPN device. |
| **Encryption algorithm** | Yes | The encryption algorithm for the tunnel (AES-128 or AES-256) |
| **Integrity algorithm** | Yes | The integrity/hash algorithm (SHA-1 or SHA-256) |
| **Diffie-Hellman group** | Yes | The DH group for key exchange: Group 14 (MODP 2048-bit), Group 19 (ECP 256-bit), or Group 20 (ECP 384-bit) |
| **IKE lifetime (seconds)** | Yes | How long the IKE security association lasts before renegotiation (e.g., 28800 = 8 hours) |
{% hint style="info" %}
These values must match your VPN gateway's configuration exactly. During tunnel setup, Kognitos sends a single cryptographic proposal based on your selections. If your VPN device does not support that exact combination, the negotiation will fail with a `NO_PROPOSAL_CHOSEN` error.
Perfect Forward Secrecy (PFS) is enabled automatically using the selected DH group. NAT Traversal (NAT-T) is also handled automatically. If NAT is detected between the peers, IPsec traffic is encapsulated over UDP port 4500.
Check with your network administrator if you are unsure which settings to use.
{% endhint %}
### 4. Authentication
| Field | Required | Description |
| ------------------------ | -------- | ------------------------------------------------------------------------------------------------------------------ |
| **Pre-shared key (PSK)** | Yes | A strong, random key shared between Kognitos and your VPN gateway. Avoid recognizable words, phrases, or patterns. |
Click Advanced settings to configure optional DNS and health check settings.
### 5. DNS Configuration (Optional)
Specify DNS servers on your private network so Kognitos can resolve internal hostnames through the tunnel. For DNS-based lookups to work, you also need to list the search domains to query against those servers.
| Field | Required | Description |
| ------------------ | -------- | ----------------------------------------------------------------------------------------------------------------------------------------------------------- |
| **DNS server IPs** | No | The IP addresses of DNS servers on your network used to resolve internal hostnames (for example, `10.0.0.2`). Click Add to add multiple servers. |
| **Search domains** | No | The DNS search domains appended to unqualified hostnames (for example, `corp.example.com`). Click Add to add multiple domains. |
### 6. Health Check (Optional)
Health checks verify that the tunnel is working by periodically testing connectivity to a target on your network.
| Field | Description |
| ---------------------- | -------------------------------------------------------------------------------------- |
| **Health check type** | Choose **ICMP (Ping)**, **TCP**, or **HTTP** |
| **Target** | The IP address or hostname to check |
| **Port** | The port to connect to (TCP and HTTP only) |
| **Path** | The URL path to request (HTTP only, e.g., `/health`) |
| **Interval (seconds)** | How often to run the check (default: 30) |
| **Timeout (seconds)** | How long to wait for a response (default: 10) |
| **Failure threshold** | Number of consecutive failures before marking the connection as unhealthy (default: 3) |
| **Success threshold** | Number of consecutive successes before marking it healthy again (default: 1) |
Click **Create connection** to save, or **Cancel** to discard.
## Viewing a Remote Connection
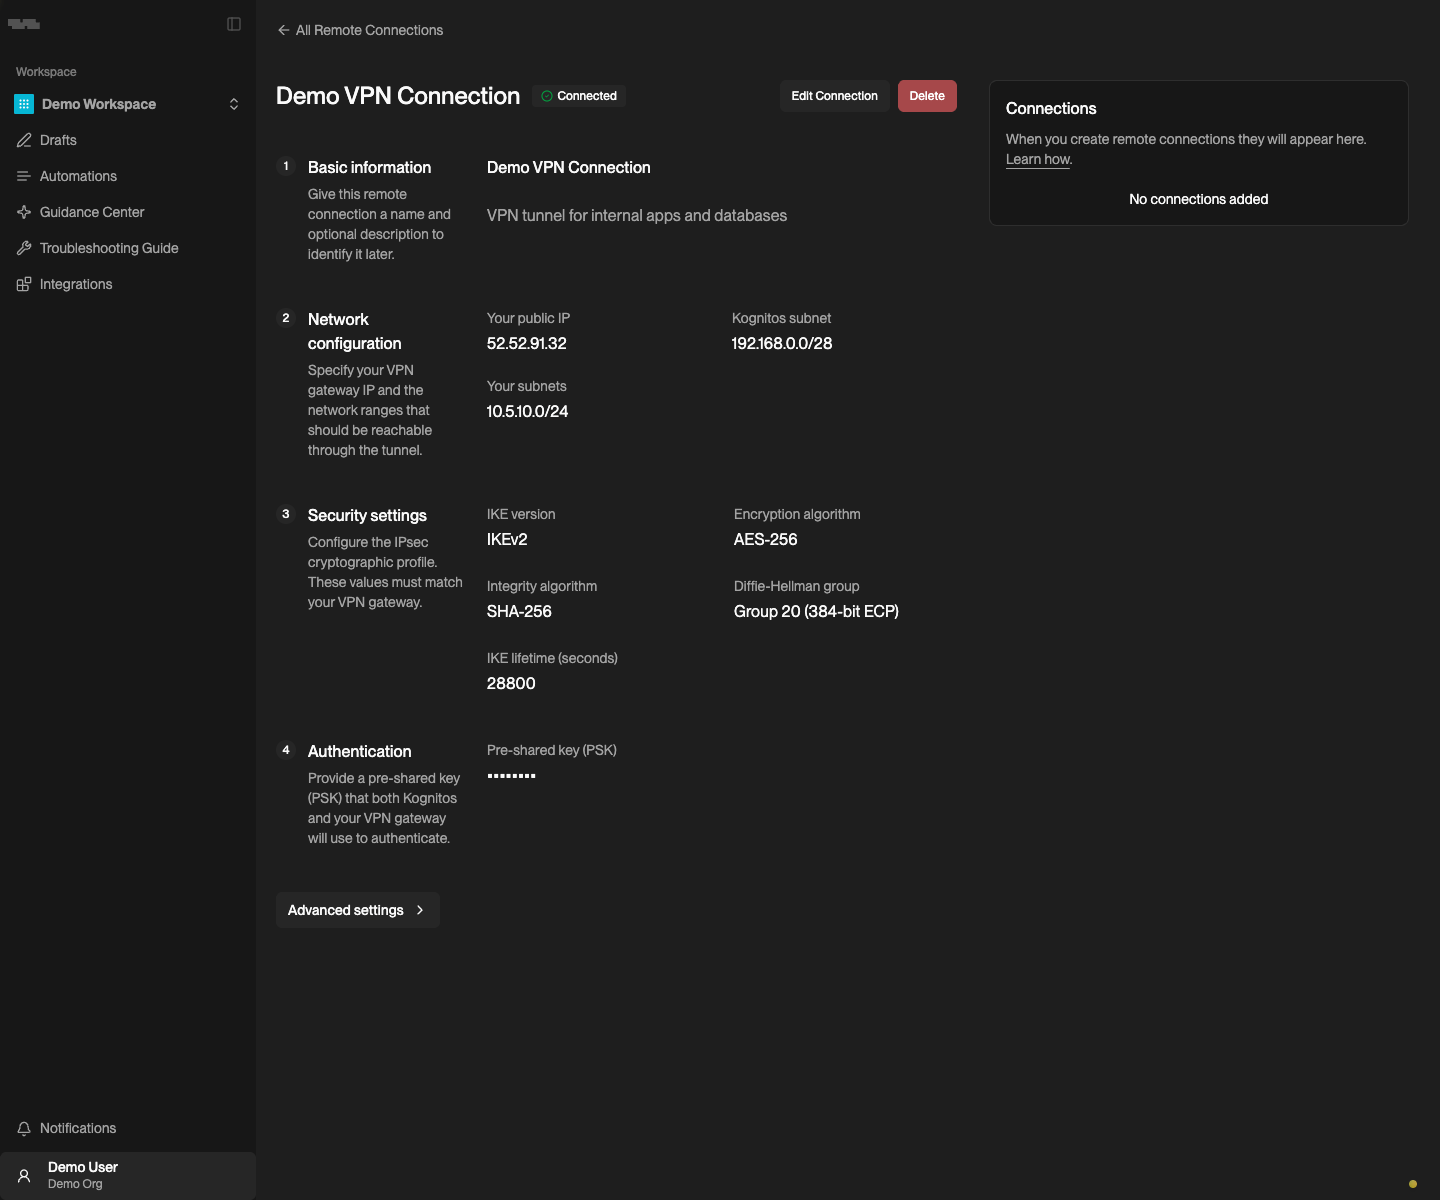
Click any remote connection from the list to view its details. The detail page shows:
* Connection name and status (**Connected** or **Disconnected**)
* The saved configuration sections, including basic information, network configuration, security settings, and authentication
* Optional advanced settings, if configured
* A **Connections** section that lists any integration connections routed through this remote connection
Click **Edit Connection** to modify the configuration.
## Connecting an Integration
The detail page includes a **Connections** section that shows which integration connections use this remote connection. To associate an integration, create or edit a [connection](/guides/platform/integrations.md#connections) for that integration and select the remote connection during setup.
{% hint style="success" %}
You can associate multiple integrations with the same remote connection. This is useful when several services live on the same private network.
{% endhint %}
## Use Cases
* **On-premises databases**: connect to a Postgres, MSSQL, or Oracle instance running inside your data center
* **Internal APIs**: reach HTTP endpoints deployed in a VPC or behind a corporate firewall
* **Legacy systems**: integrate with ERP or line-of-business applications (such as SAP or Epicor) that are only accessible on your internal network
* **Compliance-restricted environments**: keep sensitive data traffic within a VPN tunnel to meet regulatory requirements